Spring Backpacking the Enchantments: Snow Lakes Trail to the Core


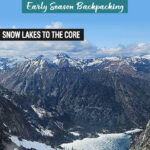

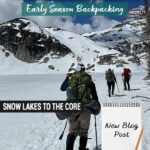


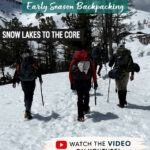


Backpacking the Enchantments via the Snow Lakes Trail in spring is a completely different experience than hiking it in summer—and honestly, that’s what makes it so unforgettable.
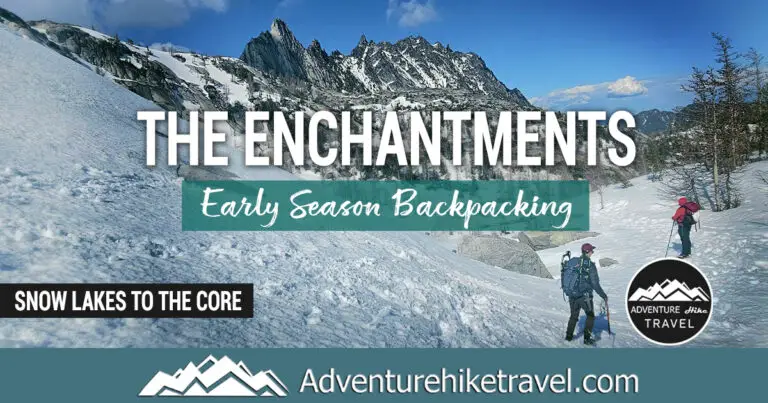
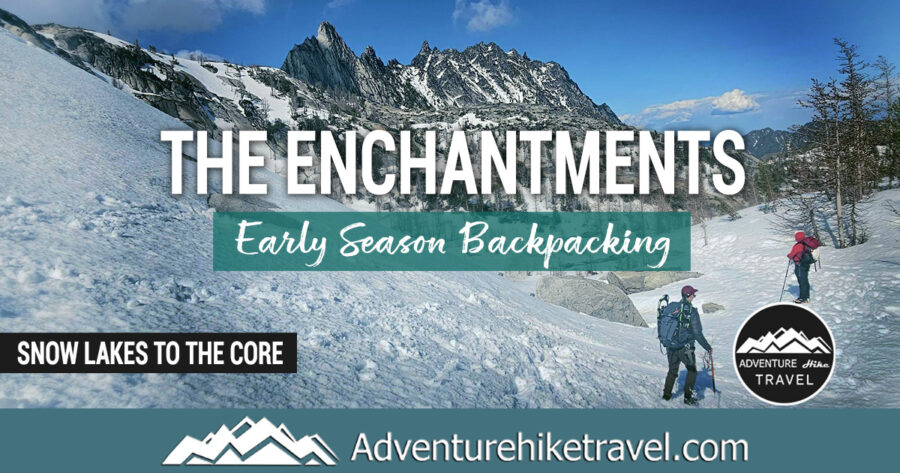
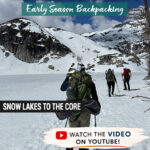
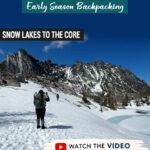
This is the kind of trip where the landscape changes constantly. You’ll start on dry trail surrounded by wildflowers and fresh greenery, then gradually climb into a world of snow-covered terrain, frozen alpine lakes, and rugged granite peaks. It feels like hiking through two seasons in a single day.
But spring conditions also add a layer of challenge. Once you reach Snow Lakes, snow and ice take over, slowing your pace and turning the climb into the core into a more technical, gear-heavy adventure. Crampons, ice axes, and careful footing become part of the experience.
If you’re prepared for it, though, this version of the Enchantments is hard to beat. Fewer crowds, dramatic scenery, and a raw, untouched feel that you just don’t get later in the season. My group was the only one up in the core zone, and we saw very few people on this backpacking trip. Hiking the Enchantments in early spring is challenging, beautiful, and easily one of the most rewarding backpacking trips in Washington.

Quick Facts: Snow Lakes Trail to the Enchantments
Location: Alpine Lakes Wilderness
Trailhead: Snow Lakes Trailhead (Leavenworth, WA)
Trail Name: Snow Lakes Trail #1553
Distance: 14–16 miles round trip (depending on campsite location)
Elevation Gain: ~4,300 feet
Highest Elevation: ~5,500 feet
Difficulty: Hard
Trail Type: Out-and-back (or through-hike via Core Enchantments to Colchuck)
Best Season: May–October (spring conditions may include snow and ice)
Average Time:
- Day hike: 8–12+ hours
- Backpacking: Typically 2–3 days
Hike Type: Backpacking trip or very long, strenuous day hike
Permits Required:
- Parking Pass: Northwest Forest Pass or America the Beautiful Pass
- Overnight Permit: Enchantments Lottery Permit (required May 15 – October 31)
Trailhead Amenities:
- Vault pit toilet at trailhead
- Additional pit toilets near Nada Lake and Snow Lakes
Cell Service: None
Dogs: Not allowed
Stock Use: Not allowed
Max Group Size: 12 people
Distance from Seattle: ~2.5–3 hours
Ranger District:
Wenatchee River Ranger District
(509) 548-2550


Parking at the Snow Lakes Trailhead (Leavenworth, WA)
To start your Enchantments backpacking trip, you’ll park at the Snow Lakes Trailhead just outside of Leavenworth, Washington—about a 2.5 to 3-hour drive from Seattle.
The parking lot here is moderate in size, but it fills up fast—especially during peak season and weekends. In the summer months, it’s not uncommon for the lot to be full early in the morning.
If you’re planning to hike between June and September, I highly recommend arriving before 7:00 AM to secure a spot. Even in late spring, weekends can get busy quickly.
If the lot is full, you do have a backup option. You can park in town near Leavenworth and arrange for a shuttle, rideshare, or drop-off at the trailhead. Just make sure to plan this ahead of time, as service can be limited early in the morning or later in the evening.
💡 Quick Tips for Parking
- Arrive early (before 7 AM in peak season)
- Have your Northwest Forest Pass or America the Beautiful Pass ready
- No overnight parking issues with proper permits
- Do not block roadways or park illegally—tickets are common

Driving Directions to the Snow Lakes Trailhead from Seattle
The drive to the Snow Lakes Trailhead takes about 2.5 to 3 hours, depending on traffic and road conditions.
From Seattle, you’ll head east over Snoqualmie Pass before dropping down into the Leavenworth area:
- Take I-5 North, then merge onto I-90 East toward Spokane
- Follow I-90 for about 77 miles over Snoqualmie Pass
- Take Exit 85 for WA-970 toward Wenatchee
- Continue on WA-970 for ~10 miles, then merge onto US-97 North
- Follow US-97 North for about 35 miles
- Turn left onto US-2 West toward Leavenworth
- Drive about 4 miles, then turn left onto Icicle Road
- Continue for ~4 miles—look for signs for the Snow Lakes Trailhead on your left
💡 Helpful Tips
- Roads are fully paved all the way to the trailhead
- Check Snoqualmie Pass conditions in early spring or late fall
Co-ordinates: 47.5441, -120.7097

Are There Restrooms at the Snow Lakes Trailhead?
Yes—there is a vault pit toilet available at the Snow Lakes Trailhead.
When I visited, it was well stocked with toilet paper, but it’s always a good idea to bring your own just in case—especially during the busy summer months when both day hikers and backpackers are using the trail.
There are also additional pit toilets along the trail, including near Nada Lake and around Snow Lakes, which can be helpful if you’re backpacking into the area.

Day 1: Hiking to Snow Lakes from the Icicle Creek Trailhead
Day one of backpacking the Enchantments via the Snow Lakes Trail starts at the Snow Lakes Trailhead along Icicle Creek near Leavenworth, Washington.
For our group, it took about 7.5 hours total to reach our campsite near Snow Lakes, including breaks. Our moving time was around 6 hours and 30 minutes, with the rest spent stopping for snacks, photos, and much-needed rest.
This is a long but steady climb—about 7 miles with over 4,000 feet of elevation gain—especially with heavy overnight packs. The good news is that the trail is very well maintained and follows a consistent, gradual incline most of the way, making it easier to find a rhythm despite the distance. Navigation is also straightforward, with a clear path and minimal obstacles—so you’re not constantly climbing over deadfall, roots, or loose rock fields like you might on more rugged trails.
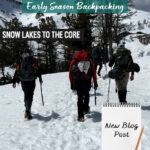
That said, the weight of our packs definitely added to the challenge. Between tents, sleeping gear, and extra winter equipment like snowshoes, crampons, ice axes, radios, avalanche beacons, and shovels, we were carrying a lot. Our pack weights ranged from 38 to 58 pounds, with most of us in the 40-pound range—definitely heavier than our typical summer backpacking setups.

The Trail: What to Expect
Starting Out: Icicle Creek & The First Climb
Leaving the parking lot, the trail quickly drops down to Icicle Creek, where you cross a large wooden bridge over rushing whitewater. It’s a pretty scenic way to start the hike and a good reminder to soak it in early—because the climbing starts soon after.
After crossing, you’ll follow a wide gravel road for a short stretch past a utility facility before the trail officially begins its ascent. And it doesn’t take long to feel it.
Within the first mile, you’ll gain around 800 feet of elevation as the trail climbs steadily upward through a series of switchbacks.
When we hiked this in May, this section felt alive—chipmunks darting across the trail, birds overhead, and there were lots of butterflies floating along. In May, there were already lots of wildflowers starting to bloom, with vibrant purple lupine lining parts of the trail, mixed with fresh green growth and the charred remains of trees from a past wildfire.


Into Snow Creek Valley
As you continue, the trail eases slightly and leads you deeper into the Snow Creek drainage. This stretch is incredibly scenic, with a mix of new forest growth, surviving pine trees, and massive granite boulders scattered throughout the landscape—some as big as houses.
The area still shows signs of an old burn, but it’s been reclaimed by new life, creating a really unique contrast. There are several open viewpoints along the way where you can see jagged cliffs, rolling hills, and distant peaks—definitely spots where we had to stop and take it all in (and snap a few photos).
This section is also popular with climbers heading toward Snow Creek Wall, a massive granite face towering across the valley.

Log Bridge Over Snow Creek
Around 2.5 miles in, you’ll cross a wooden log bridge over Snow Creek—one of the first major landmarks along the trail.
Shortly after, you’ll pass a sign marking that campfires are prohibited beyond this point. The trail levels out briefly here before continuing through forested sections and eventually transitioning into rockier terrain.


Reaching Nada Lake
At around 4.5 to 5 miles in, you’ll reach Nada Lake.
The trail hugs the right side of the lake, and you’ll start to see signs pointing toward campsites and a pit toilet tucked into the trees. There are quite a few established backcountry campsites here—some large enough for bigger groups, with flat ground covered in pine needles, natural seating like logs and rocks, and plenty of trees suitable for hammock camping.
This is a great place to take a longer break or even camp if you’re splitting the hike into shorter days.


The Climb Above Nada Lake (Steepest Section)
After leaving Nada Lake, the trail quickly transitions into the steepest and rockiest section of the day.
You’ll climb up a series of rocky talus slopes, gaining elevation quickly. This part definitely gets your heart rate up, but it’s also one of the most scenic sections of the entire hike to Snow Lakes.
Be sure to turn around here—looking back down at Nada Lake from above is absolutely incredible. The deep blue water set against bright granite rock and rugged peaks makes for one of the best views of the day. This was easily one of my favorite sections of the entire hike up to Snow Lakes.

First Views of Snow Lakes
After pushing through the climb, the trail eventually flattens out and heads back into the forest. Not long after, you’ll get your first glimpse of Snow Lakes—and it’s a good one.
The turquoise water is stunning, especially with the dramatic backdrop of McClellan Peak towering above the lake.
Along the shoreline, you’ll notice large piles of bleached driftwood scattered along the water’s edge. It almost looks like a collection of whitewashed logs stacked up over time. Definitely adds to the contrast for great pictures.
In May, the water level was noticeably lower, exposing the shoreline where the lake sits much higher later in the summer after full snowmelt.


Finding A Campsite On The Far Side of Snow Lakes
The trail continues along the left side of Snow Lakes, and this is where conditions started to change for us.
Up until this point, the trail had been mostly snow-free. But along the lake, we began to encounter more snow-covered sections, making navigation a bit trickier as we picked our way through trees and around patches of snow. Here, the snow got a bit punch-holey, where you may randomly sink up to your knee in spots, but for the most part was hard and compact.
We passed several large campsites along the lake, but many were either already taken, too wet and muddy, or still covered with snow. Eventually, we found a mid-sized spot near a large rock on the far side of the lake that worked for our group of six.
After a long day of climbing, finally dropping our packs and setting up camp, and diving into some heated-up backpacking meals felt incredibly rewarding.


Day 1 Recap
- Distance: ~7–8 miles
- Elevation Gain: ~4,100–4,200 feet
- Time: ~7–8 hours (with breaks)
- Difficulty: Long, steady climb with a steep section after Nada Lake

💬 Final Thoughts on Day 1
Day 1 is no joke—it’s a long, steady uphill grind, especially with a full pack. But the trail is well-maintained, easy to follow, and packed with incredible scenery the entire way.
By the time you reach Snow Lakes, you’ll definitely feel like you earned it—and you’ll be perfectly set up for the climb into the core on Day 2.

Day 2: Hiking from Snow Lakes to the Core Zone
Leaving Snow Lakes, we began our climb up into the core zone of the Enchantments.
For Day 2, we hiked 4.23 miles into the core, gaining about 2,342 feet of elevation. Since we returned back to camp at Snow Lakes, our total for the day came out to 8.46 miles round trip.
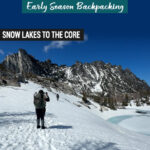
Even though the elevation gain was lower than Day 1, this day ended up being more challenging and much slower. As soon as we started climbing above Snow Lakes, the trail transitioned completely into snow and ice-covered terrain. Up until the lake, conditions had been mostly dry—but from this point on, it felt like full winter.
We ended up putting on Microspikes right away and Switched to Full Crampons and had ice Axes out during the whole time in the Core Zone, which significantly slowed our pace. Every step required more attention, and route-finding became more important as sections of the trail were buried under snow.

Climbing Out of Snow Lakes
One of the first major landmarks you’ll encounter is Upper Snow Creek Falls, located about 0.5 to 0.7 miles uphill from Snow Lakes, with roughly 500–700 feet of elevation gain.
This waterfall is absolutely stunning—especially in spring with strong runoff—and framed by rugged mountain peaks in the background. It’s one of those spots that feels straight out of a postcard and a great early reward for the climb.
From here, the trail continues steadily upward, and as you begin to emerge above the trees, the views really start to open up. For a good portion of the climb, you’re treated to expansive alpine scenery, making the effort feel a lot more rewarding.


Snow Travel & Wildlife Encounters
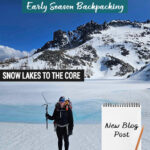
As we continued upward, we switched between microspikes and crampons depending on the terrain. The climb itself is fairly gradual, but the snow coverage made everything more technical and slower going.
Along the way, we were lucky enough to spot mountain goats, including a mama and her kid. It’s always such a cool experience to see wildlife up here, but we made sure to give them plenty of space and continued on without disturbing them.


Entering the Core Enchantments
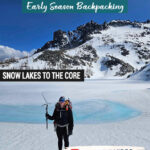
Eventually, we reached Lake Viviane, which marks the beginning of the core zone. From here, the day shifted from climbing to fully soaking in the scenery—and honestly, this is where the Enchantments really start to live up to the hype.
We spent some time here taking in the views of Prusik Peak rising dramatically above the lake. With snow still covering much of the landscape and the lake beginning to melt out, the contrast was unreal. The water had that deep, glacial blue color, reflecting the surrounding peaks and patches of snow—it felt like one of those places where every angle looks like a postcard. We definitely lingered here for a bit, taking photos and just appreciating finally being in the core.
The core of the Enchantments is honestly hard to put into words—especially in spring. Snow blankets the granite basins, while partially thawed lakes cut through the white landscape in these brilliant shades of turquoise and blue. It’s a mix of winter and summer at the same time, and it makes the entire area feel almost surreal.


From Lake Viviane, we continued on to Leprechaun Lake, where the scenery somehow kept getting better. With McClellan Peak towering above, this area felt a little more rugged and dramatic. The lake itself was still partially frozen, with sections of open water reflecting the surrounding peaks. It was another spot where we couldn’t help but stop for photos—the kind of place where you think “okay this has to be the best view”… and then it just keeps getting better.


Next, we made our way to Perfection Lake, which was still entirely frozen when we went in mid-May, but still had stunning scenery.


From there, we continued on to Inspiration Lake, and true to its name—it really is inspiring. The basin opens up a bit more here, and you get these wide, sweeping alpine views in every direction. It’s the kind of place where you could easily spend hours just wandering around, finding different angles, and taking it all in.


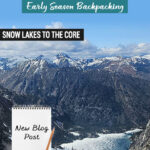
From Inspiration Lake, we made the climb up to a higher viewpoint overlooking Colchuck Lake—and this was easily one of the biggest highlights of the entire trip. Looking down at that iconic, bright blue lake just starting to thaw out from above, surrounded by rugged peaks and snow-covered slopes, was absolutely unreal. It’s one of those views that just stops you in your tracks.

We even spotted another mountain goat up here, which made the moment even more memorable. Standing there, taking in the view, it really hit us just how special this place is.
Why We Skipped Aasgard Pass
Originally, we had considered going over Aasgard Pass, but before the trip we had heard reports of hikers needing rescue due to extreme ice conditions. Combined with road closures that would have added extra mileage, we decided it was safer to explore the core and return the same way via Snow Lakes.
Given the conditions we encountered, this ended up being the right call.


Glissading Back to Camp
Heading back down turned out to be one of the most fun parts of the day.
With the spring snow conditions, many of the steeper sections were perfect for glissading, and we took full advantage of it. Sliding down sections we had just climbed made the descent way faster—and honestly, way more fun.
By the time we got back to camp, we still had enough daylight to filter water, cook dinner, and relax a bit before turning in for the night.
Even though it had been warm enough for T-shirts during the day, temperatures dropped quickly in the evening. It got freezing overnight, and my boots actually froze solid—which made getting up in the middle of the night… not exactly enjoyable 😅.

Day 2 Recap
- Distance: 8.46 miles round trip
- Elevation Gain: ~2,342 feet
- Time: Full day (slow travel due to snow and ice)
- Difficulty: Moderate distance, but more technical due to snow conditions
- Gear Used: Microspikes, crampons, ice axes
💬 Final Thoughts on Day 2
Day 2 was hands-down the most memorable part of the trip.
Even though it wasn’t the biggest mileage or elevation day, the snow and ice conditions made it feel like a completely different kind of adventure compared to Day 1. It required more focus, more gear, and a slower pace—but that’s also what made it so rewarding.
Getting to experience the core of the Enchantments in these conditions felt incredibly amazing. The combination of frozen landscapes, melting alpine lakes, and fewer crowds made it feel wild and untouched in a way that you just don’t get later in the summer.
It was challenging, beautiful, and absolutely worth the effort. The views were so incredibly stunning, the core zone is absolutely stunning!
Day 3: Hiking Back to the Trailhead
After a cold night at Snow Lakes, we woke up, made breakfast, and started packing up camp for the hike back to the trailhead.
With spring conditions, a lot of our gear had gotten damp from snow and mud, so we did our best to wipe things down before packing—but this was definitely one of those trips where everything needed a proper dry-out once we got home.
The Long Descent
The hike back to the car is straightforward—but don’t underestimate it. Even though it’s mostly downhill, it’s a long descent, and after the previous two days, your legs will definitely feel it.
For us, the way down turned into a bit of a slow grind. The combination of warmer daytime temps and snow the day before led to some post-holing, which soaked our boots. Then overnight, those boots froze solid.
So heading downhill in wet boots made things a lot more uncomfortable than expected—and definitely contributed to some pretty good blisters by the end of the day.
Trail Conditions on the Way Out
Once we got below Snow Lakes, the trail returned to mostly dry conditions again, making travel easier and faster. The familiar sections—Nada Lake, the log bridge over Snow Creek, and the long switchbacks—felt very different on the way down.
What felt like a steady climb on the way up now turned into a constant pounding on the feet and knees, especially with a full pack.
Even though the trail is well-maintained and easy to follow, the distance and elevation loss make this descent more tiring than you might expect.
Back at the Trailhead
Finally making it back to the trailhead felt incredibly rewarding. After three days of hiking, climbing, snow travel, and exploring the core Enchantments, it was one of those moments where you’re exhausted—but also already thinking about when you’ll come back.
Day 3 Recap
- Distance: ~7–8 miles
- Elevation Loss: ~4,000+ feet
- Time: 4–6 hours depending on pace
- Difficulty: Moderate, but hard on the body due to long descent
💬 Final Thoughts on Day 3
Day 3 might seem like the “easy” day, but it still requires some endurance—especially on tired legs and with a full pack.
The biggest challenge for us wasn’t navigation or terrain—it was simply the wear and tear from multiple days on the trail, combined with wet and frozen gear.
That said, it’s a beautiful hike out, and a satisfying way to wrap up an incredible trip through the Enchantments.
Lessons Learned from Backpacking the Enchantments in Spring
This trip was absolutely incredible—but spring conditions in the Enchantments definitely come with some extra challenges. Here are some of the biggest lessons we learned along the way:
🥾 Waterproof Your Boots (Seriously)
Wet boots were one of our biggest struggles on this trip. Between snow travel, post-holing, and melting conditions, it’s almost impossible to keep your feet completely dry.
Make sure your boots are properly waterproofed before your trip, and bring multiple pairs of extra socks. I went through three pairs that got completely soaked from the snow, so having backups is huge—not just for comfort, but for preventing blisters.
❄️ Be Prepared for Winter Conditions
Even if the lower trail is completely dry, don’t let that fool you. Once you get above Snow Lakes, conditions can quickly turn into full winter mode.
We ended up using microspikes, crampons, and ice axes, and having the right gear made a huge difference in both safety and confidence on the trail.
⏱️ Expect Slower Travel Times
On paper, Day 2 didn’t look as intense as Day 1—but it ended up taking just as long due to snow and ice.
Plan for slower movement, more breaks, and extra time when traveling in spring conditions.
🎒 Pack Weight Adds Up Fast
Between overnight gear and winter equipment, our packs were significantly heavier than usual. That extra weight really adds up over long distances and elevation gain.
If possible, try to pack efficiently and only bring what you truly need—your legs will thank you.
🐐 Respect Wildlife
We were lucky enough to see multiple mountain goats throughout the trip, including a mama and her kid.
Always give wildlife plenty of space and avoid approaching or feeding them. It’s amazing to see them in their natural habitat—but it’s important to keep it that way.
🧭 Navigation Gets Trickier in Snow
Even on a well-defined trail like the Snow Lakes route, snow coverage can make it harder to follow the path—especially around the lakes.
Having a GPS, downloaded maps, or route tracking can make a big difference when the trail disappears under snow.
☀️ Be Ready for Big Temperature Swings
During the day, it was warm enough for T-shirts. At night, temperatures dropped below freezing—and even froze our boots solid.
Layering is key. Be prepared for both warm hiking conditions and freezing overnight temps.
💙 It’s 100% Worth It
Despite the challenges—heavy packs, snow travel, frozen boots—this was easily one of the most memorable backpacking trips we’ve done.
Seeing the Enchantments in spring, with fewer crowds and that mix of snow, ice, and glowing blue lakes, is something really special.

Gear Needed for Spring Conditions in the Enchantments
Spring in the Enchantments means you’ll be dealing with a mix of dry trail, snow, and full winter conditions—especially above Snow Lakes. Here’s the gear I’d recommend bringing:
- Microspikes and/or crampons (we used both depending on terrain)
- Ice axe (for stability and safety on snow-covered slopes)
- Depending on conditions (skis or snowshoes)
- Avalanche gear, shovel, probe, beacon.
- Gaiters (to keep snow out of your boots)
- Waterproof hiking boots (make sure they’re in good condition)
- Multiple pairs of extra socks (I soaked 3 pairs—definitely bring backups)
- Moisture-wicking base layers
- Insulating layer (fleece or down jacket)
- Waterproof shell jacket
- Possibly Snow Pants
- Gloves and a beanie
- Trekking poles (huge help for balance on snow and downhill)
- Backpack with proper support for heavier loads
- Tent or shelter
- Sleeping bag rated for freezing temperatures
- Insulated sleeping pad
- Camp stove + fuel
- Lighter or matches
- Food and snacks for multiple days
- Water bottles or hydration reservoir
- Water filter or purification system
- Headlamp or flashlight (with extra batteries)
- GPS, downloaded maps, or a navigation app like Gaia
- Garmin inReach for satellite communication
- Walkie-talkies to communicate with your group
- First aid kit
- Blister kit (very useful for this trail)
- Sunglasses (snow glare is intense)
- Sunscreen
- Dry bags or stuff sacks to keep gear dry
- Trek towel or small cloth for drying gear
- Trash bag/Ziplock baggies (pack everything out and keep it separate in your pack)
💬 Quick Take
Spring conditions mean carrying a bit more gear than usual, but having the right setup makes the trip much safer, more comfortable, and way more enjoyable.
Is This Hike Right for You?
Backpacking the Enchantments via the Snow Lakes route in spring is an incredible experience—but it’s not for everyone.
This hike is a great fit if you:
- Have previous backpacking experience and are comfortable with long days on the trail
- Are prepared for 4,000+ feet of elevation gain with a heavy pack
- Have experience (or are willing to learn) basic snow travel skills
- Don’t mind slower travel, changing conditions, and a bit of unpredictability
Spring conditions add a layer of challenge that you won’t get in summer. Once you get above Snow Lakes, the trail can quickly turn into snow-covered, technical terrain, where traction, route-finding, and footing matter more.
This hike may not be the best fit if you:
- Are brand new to backpacking
- Don’t have the proper snow gear (microspikes, crampons, ice axe)
- Prefer well-defined, dry trails
- Are not comfortable navigating in partially snow-covered terrain
That said—if you’re prepared, this trip is incredibly rewarding. You’ll experience the Enchantments in a way that feels more remote, wild, and far less crowded than peak summer.
Spring vs Summer in the Enchantments
Hiking the Enchantments in spring vs summer feels like two completely different experiences.
🌸 Spring (May–June)
- Snow & Ice: Expect snow-covered terrain above Snow Lakes
- Fewer Crowds: Much quieter—our group had the core zone almost entirely to ourselves
- More Technical: Requires traction, ice axe, and careful footing
- Slower Travel: Snow and route-finding can significantly slow your pace
- Unique Scenery: Frozen lakes, melting ice, and glowing blue water create unreal views
☀️ Summer (July–September)
- Dry Trails: Mostly snow-free and easier to navigate
- Heavier Crowds: One of the most popular backpacking areas in Washington
- Faster Travel: No snow means quicker hiking times
- Warmer Temps: More comfortable overnight conditions
- Classic Views: Fully melted alpine lakes with vibrant blue water
💬 Which One Is Better?
It really depends on what you’re looking for.
- Want easier hiking and classic conditions? → Summer
- Want fewer people, more adventure, and dramatic scenery? → Spring
For us, spring was 100% worth it. It was more challenging—but also way more unique.
💬 Final Thoughts: Backpacking the Enchantments in Spring
Backpacking through the Enchantments via the Snow Lakes Trail in spring is one of those trips that sticks with you long after it’s over.
It’s not the easiest version of this hike. The added snow, heavier packs, and slower pace make it more demanding—but that’s also what makes it so memorable.
You get to experience the Enchantments in a completely different way—frozen landscapes, glowing blue lakes just starting to melt, and a level of quiet that’s hard to find later in the season. For much of the trip, it felt like we had the entire place to ourselves.
It’s the kind of adventure where you deal with wet boots, freezing nights, and tired legs—but at the same time, you’re surrounded by some of the most incredible scenery in Washington.
If you’re prepared for the conditions and up for the challenge, this is easily one of the most rewarding backpacking trips you can do.
Information Center:
For Additional information on Snow Lakes and the Enchantments you can contact the Wenatchee River Ranger District Office in Leavenworth, WA at (509) 548-2550 or the Cle Elum Ranger District in Cle Elum, WA at (509) 852-1100 for the latest conditions and restrictions.
Wenatchee Ranger District - Leavenworth, WA Office
Operating hours are Monday through Friday 8:30 a.m. to 4 p.m.
Phone: (509) 548-2550
Address:
600 Sherbourne,
Leavenworth, WA 98826
Cle Elum Ranger District - Cle Elum, WA Office
Operating hours are Monday through Friday, 8:30 a.m. to 4:30 p.m., with a lunch closure from 12:30 to 1:15 p.m. Permit sales conclude at 4 p.m.
Phone: (509) 852-1100
Address: 803 W. 2nd Street
Cle Elum, WA 98922

Want To Fill Your Life With Adventure?
Join our newsletter for an adrenaline-fueled journey! Receive exclusive updates on travel tips, gear reviews, epic hikes, captivating stories, and inspiration to turn your dreams into reality.
Don't just dream it, live it! Get Out There!