Splitboarding to the Lunch Counter on Mt. Adams


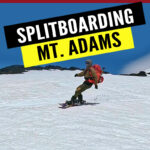
If you’re looking for a spring splitboard adventure with jaw-dropping views, endless snowfields, and an amazing descent, Mt. Adams delivers. The route to the Lunch Counter via the South Climb trail is a classic among backcountry riders—and now we know why.
In this post, I'll walk you through the route we took and a firsthand look at our own attempt to summit Mt. Adams in a single day (spoiler: things didn’t quite go as planned... but the turns were still epic).


🏔️ Quick Trail Stats
-
Trailhead: Cold Springs Campground (~5,555 ft)
-
Lunch Counter Elevation: ~9,300 ft
-
Elevation Gain: ~3,700–3,800 ft
-
One-Way Distance to Lunch Counter: ~5–6 miles
-
Best Time to Ride: Late May to early July
-
Permit Required: Cascade Volcano Pass for travel above 7,000 ft (May–Sept)

 Directions from Seattle to Mt. Adams South Climb Trailhead
Start your journey by heading to Cold Springs Campground, the main access point for the South Climb route. Depending on the snow year, the road may be snow-covered several miles from the actual trailhead early in the season, so check conditions before you go. You'll need a high-clearance vehicle if snow levels are still low but passable.
Total Time: ~4.5–5.5 hours
Distance: ~215 miles
-
Take I-5 South → I-205 South (bypass Portland).
-
Exit onto WA-14 East toward White Salmon.
-
In White Salmon, take WA-141 North to Trout Lake.
-
From Trout Lake:
-
Take FR 23 → Right on FR 80 → Left on FR 8040
-
Drive ~4.5 miles to Cold Springs Campground / South Climb Trailhead
-
 Trailhead GPS: 46.1430° N, 121.4941° W
Note: Last few miles may require high-clearance vehicle or walking if snow-covered.
Permits required above 7,000 ft (Cascade Volcano Pass).


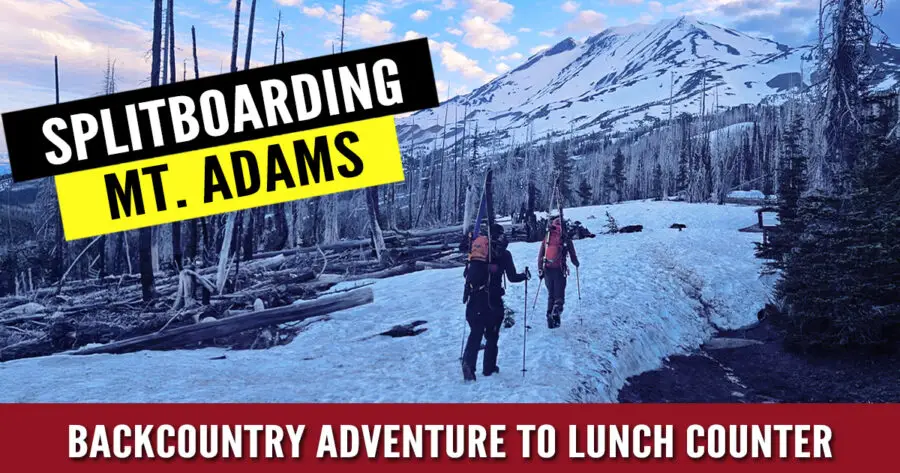
The Start of the Journey
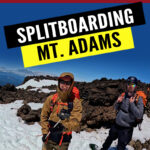
We kicked things off by loading the car and grabbing our crew—Andrew, Jason, and myself (Robert from Adventure Hike Travel). Our goal? Drive down to Mt. Adams, camp at the trailhead, and hit the summit in a single day via the Southwest Chutes.
We knew snow still blocked parts of the road, so we were hoping we could get close to the upper trailhead. Fortunately, the snow had melted just enough for us to drive most of the way. Our plan was to sleep at the lower trailhead, then move up in the morning to start our climb.
But here’s where things started going a little sideways…
We had planned to hit the trail at 4:00 AM, but the logistics of moving camp from the lower to upper trailhead ate up time. Between packing up, driving, and reorganizing our gear, we didn’t get moving until 5:50 AM—almost two hours later than planned.
Lesson learned: if you want a true alpine start, camp where you plan to start.

🛠️ When Everything Starts to Break
It didn’t take long before gear issues started stacking up.
-
Jason’s ski pole snapped while we were still at the car, leaving him to climb with only one. Not ideal, especially on steeper terrain.
-
Andrew’s splitboard binding had a missing rivet. He had to improvise a fix with tape, which worked for climbing—but none of us felt good about him riding the Southwest Chutes with a questionable binding.
Despite the hiccups, we kept skinning upward.


🥾 The Climb to the Lunch Counter
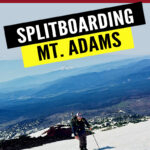
The trail begins with a short section through the forest before quickly transitioning to open terrain and snowfields. Early in the season, you’ll be skinning pretty quickly. The South Spur Route is straightforward in terms of navigation—just keep heading up.
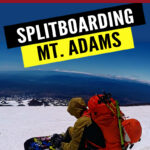
The route steadily climbs across low-angle snowfields before getting steeper as you approach the Lunch Counter, a large, relatively flat bench around 9,300 ft that serves as a popular basecamp for summit attempts. It’s often wind-protected, scenic, and a great place to set up camp—or just take a long break and soak in the views.


Check The Weather Forecast Before You Go! It Changes Fast!
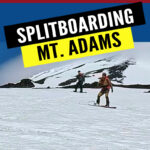
The higher we climbed, the more the wind picked up. We reached the Lunch Counter (~9,300 ft) around lunchtime—right as the winds picked up and the clouds rolled in.
We had been expecting 30 mph gusts, but a last-minute weather change (that we didn’t see until later) brought 56 mph wind gusts and a hurricane-force wind warning.
At that point, we were feeling pretty tired and with iffy gear and wild winds, we made the call to turn around at the Lunch Counter. Pushing to the summit would’ve meant softer, riskier snow and the winds beating down on us felt brutal.


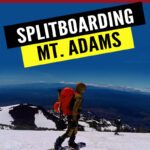
🎿 The Ride Down
Though we didn’t reach the summit, the snow from the Lunch Counter the ride down was an abosoulte blast. Soft corn snow and wide open lines made for a memorable descent—one of those rides that makes the whole effort worth it.
By the time we dropped down a few thousand feet, the snow turned insainly sticky where it became hard to ride down at all but the upper half made the whole trek worth it.
❄️ Snow Conditions & Splitboarding Beta
If you hit the conditions right, you’re in for a corn snow dream. The best time to descend is mid-morning to early afternoon when the snow has softened but hasn’t turned to mush.
Many splitboarders use the Lunch Counter as a turnaround point for a big day trip, enjoying a long and smooth descent back to the trailhead. If you’re feeling strong (and the avalanche conditions are safe), continuing to Piker’s Peak or even the summit can make for a full-value alpine day.
Snow coverage typically holds through June, and even into early July some years, so time your trip when melt-freeze cycles create ideal skinning and riding conditions.

☀️ Pro Tip: Wear Sunscreen
We were halfway home before realizing we missed a critical detail: sunscreen. All of us ended the trip with bright red faces and raccoon-like goggle lines. Rookie mistake.
 What We Learned
Splitboarding to the Lunch Counter on Mt. Adams is a big day with big rewards—but it’s not without challenges. Here are a few takeaways from our experience:
-
Camp smart: Set yourself up for success by sleeping close to your start point.
-
Double-check gear: Especially bindings and poles—those small parts matter more than you think.
-
Watch for last-minute weather changes: Don’t rely on the forecast you saw two days ago.
-
Know when to call it: The summit will still be there another day.


🏕️ Camping at the Lunch Counter
If you want to break up the climb and catch the sunrise over the Cascades, Lunch Counter is an incredible spot to camp. You’ll find pre-built rock windbreaks and room to set up your tent. Just be sure to follow Leave No Trace principles—pack everything out, including waste.

 Final Thoughts
Even though we didn’t tag the summit, splitboarding Mt. Adams to the Lunch Counter gave us everything we wanted: adventure, challenge, good snow, and a great story.
If you’re planning your own trip, aim for late spring conditions, be ready to adapt, and enjoy the process. Sometimes the best rides happen when things don’t go perfectly.
Whether you’re stopping at the Lunch Counter for a killer day ride or using it as a launchpad for a summit push, splitboarding Mt. Adams offers a big adventure feel without the techy glacier travel required on other Cascade peaks. The climb is sustained but not overly technical, and the descent is smooth, long, and totally rewarding.
Just be sure to check snow conditions, avalanche forecasts, and weather reports before heading out. Mt. Adams may be considered a “non-technical” volcano, but it’s still serious backcountry terrain.
Have questions about the route or want to share your own Mt. Adams story? Drop a comment below—I’d love to hear from you!


Want To Fill Your Life With Adventure?
Join our newsletter for an adrenaline-fueled journey! Receive exclusive updates on travel tips, gear reviews, epic hikes, captivating stories, and inspiration to turn your dreams into reality.
Don't just dream it, live it! Get Out There!


")